One of the biggest challenges of building a web application is choosing the technologies you'll use and integrating them into a working stack. Redwood.js is a React-based framework that delivers an out-of-the-box stack, so you can just work with proven technologies that are already well integrated in the framework.
Redwood.js unites React, GraphQL, and Prisma to handle your application's UI, API, and data persistence. Around this core are helper tools and built-in capabilities like testing and logging; command-line support for frameworks like Auth0 and TailwindCSS; and the ability to target both serverless and IaaS (Infrastructure-as-a-Service) deployments.
If you are looking for an easier way to build React-based applications, Redwood.js could be a great choice. Read on for a hands-on introduction to Redwood.
Set up the Redwood example application
To set up a new Redwood project, you’ll need Yarn and the current, active LTS version of Node.js installed on your development machine. Create a new application by entering the command shown in Listing 1.
Listing 1. Create a new Redwood.js application
yarn create redwood-app ./redwood-demo
cd ./redwood-demo
yarn rw dev
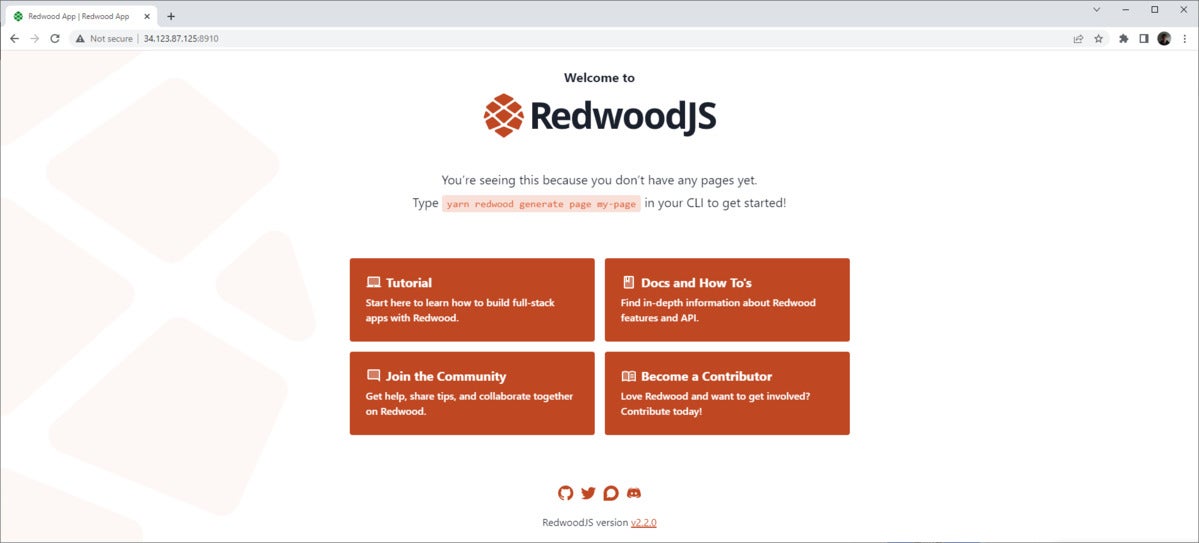
You’ll get the welcome screen shown in Figure 1 when you visit localhost:8910 in your browser. (Parameters like the port are configured with the redwood.toml configuration file.)
 IDG
IDG
Figure 1. The Redwood.js welcome screen.
Add a page on the Redwood command-line
Redwood.js includes the ability to add pages and routes from the command-line. The welcome page in Figure 1 is built-in by the framework—there is no actual file backing it. We can create our own landing page by entering the following command:
yarn redwood generate page welcome /
Here, you see the general form for Redwood commands. It says: generate a page called "welcome" with the root path (/). Now, if you visit localhost:8910, you’ll get a very basic page saying “WelcomePage." Redwood uses PascalCase in its translation of routes, and it appends the word Page. So, our “welcome” route has become “WelcomePage." You can find the page source at /web/src/pages/WelcomePage/WelcomePage.js.
Routing with Apollo GraphQL
The WelcomePage itself is not yet very interesting, but we are more interested in how Redwood handles the routing. You can find your application's routes in /web/src/Routes.js, as shown in Listing 2.
Listing 2. /web/Routes.js
import { Router, Route } from '@redwoodjs/router'

const Routes = () => {
  return (
    <Router>
      <Route path="/" page={WelcomePage} name="welcome" />
      <Route notfound page={NotFoundPage} />
    </Router>
  )
}

export default Routes
Listing 2 shows that you are using the Redwood.js router, which is similar to other solutions like React Router, but has some distinctive characteristics. In general, each Route entry provides a mapping between the URL path and the page component that provides the content for that route.
One unique characteristic about the router is that it is driven by the Apollo GraphQL state library. You can see how this is set up in /web/src/App.js, which is the application's main component. Listing 3 shows the relevant part of the code.
Listing 3. Routing via Apollo GraphQL
<RedwoodProvider titleTemplate="%PageTitle | %AppTitle">
      <RedwoodApolloProvider>
        <Routes />
      </RedwoodApolloProvider>
    </RedwoodProvider>
Redwood hides most of the details from the application developer. It uses Apollo GraphQL to manage the application state, including the routing.
Add and link a page
We’re going to create a new page to list song lyrics. To start, add the page by entering the following on the command-line:
yarn redwood generate page songs
Now, you can create a link on the WelcomePage by using the Link component, as shown in Listing 4.
Listing 4. Linking to the SongsPage
import { Link, routes } from '@redwoodjs/router'
//...
<h2>Go to <Link to={routes.songs()}>Songs</Link></h2>
Now, you can click the link and go to the Songs page, which also includes a basic welcome screen. While we won't get into it here, Redwood.js supports layouts, which you can apply across many pages to reduce the need for boilerplate code.
Working with the Redwood.js back end
Now, let's take a look at the Redwood.js back end. Redwood uses Prisma ORM to map to a database, and it includes SQLite as an in-place database for development. (Note that Redwood resembles Blitz.js in this regard.) We can add a schema for our Songs page by opening the file at api/db/schema.prism and adding the entry shown in Listing 5. (You can delete the pre-existing sample, UserExample model.)
Listing 5. Adding the Song and Songwriter models to Prisma/SQLite
model Song {
  id Int @id @default(autoincrement())
  name String @unique
  writers SongToWriter[]
}
If you are not familiar with object-relational mapping tools like Prisma, you might wonder what Listing 5 does. In essence, it creates a Song data model, which is used to translate between the application and the data store. (See the Prisma documentation to learn more about data models in Prisma.)
Prisma will apply this new model to the SQLite schema when we enter the command: yarn rw prisma migrate dev. This command applies the schema for the dev database. (Note that Prisma will ask for a name for the migration. Any value will do. In a real project, you could use this name for rollbacks.)
Add CRUD functions
Once Prisma is done, we can start using the model objects in our application because Prisma does the work of mapping to and from the database. But Redwood.js does some of the heavy lifting for us by generating the create, read, update, and delete (CRUD) scaffolding. Just enter the following on your command-line: yarn redwood generate scaffold Songs.
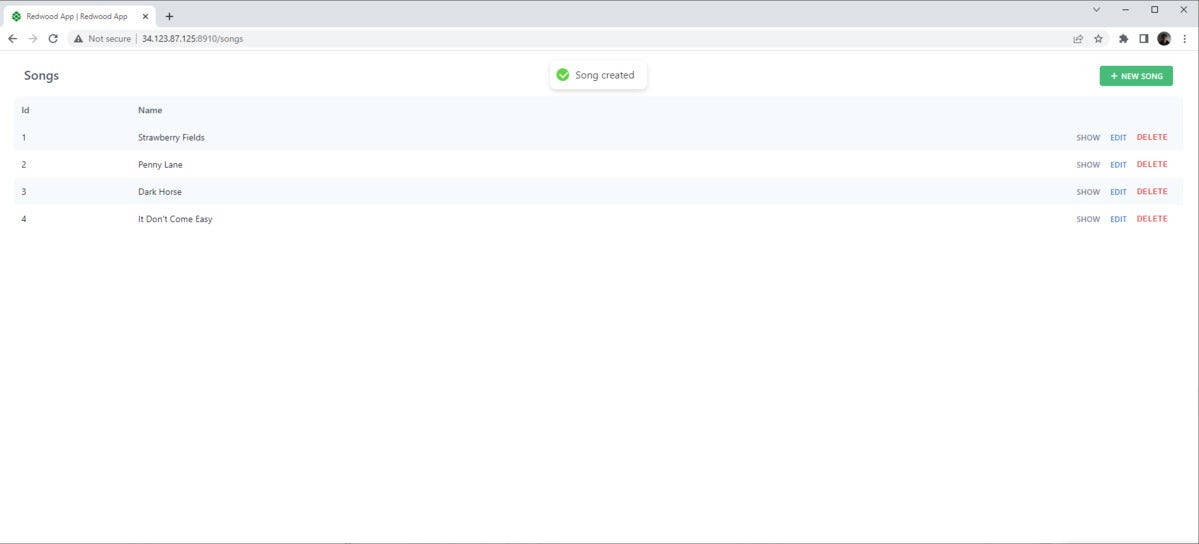
Now, if you return to the /songs page, you'll see that Redwood has built us a basic user interface based on the schema. Figure 2 shows an example of a basic UI.
 IDG
IDG
Figure 2. CRUD scaffolding on the Songs page.
So, the scaffold command creates a simple set of pages and components that we can use to create, update, and delete a Song entity. You can see the page files Redwood.js uses to achieve the user interface in /web/src/pages/Song/*. These page files, in turn, rely on the components found in /web/src/components/Song/*.
For example, take a look at /Song/SongPage/SongPage.js in Listing 6.
Listing 6. SongPage.js
import SongCell from 'src/components/Song/SongCell'

const SongPage = ({ id }) => {
  return <SongCell id={id} />
}

export default SongPage
A cell is a special component that Redwood.js offers to simplify the handling the various states of a view (loading, empty, error, and normal). It’s a handy way to handle state in a conventional fashion. You can learn more about cells in the Redwood.js documentation.
The SongCell looks like what you see in Listing 7.
Listing 7. SongCell.js
import Song from 'src/components/Song/Song'

export const QUERY = gql`
  query FindSongById($id: Int!) {
    song: song(id: $id) {
      id
      name
    }
  }
`
export const Loading = () => <div>Loading...</div>
export const Empty = () => <div>Song not found</div>
export const Failure = ({ error }) => (
  <div className="rw-cell-error">{error.message}</div>
)
export const Success = ({ song }) => {
  return <Song song={song} />
}
Here, the component exports several different functions, which output varying JSX elements. These functions are used by the Redwood.js layouts to output the correct UI depending on the state. Notice that in the case of success, Redwood.js hands off the heavy lifting to the main Song component, where all the real work is done. The Song component works in a similar template, using GraphQL to obtain and manipulate data from the data store based on a data object that drives the view. (If you are familiar with the MVC pattern, well here it is again.)
GraphQL
The application uses GraphQL to populate the data objects used by the UI. For example, in the SongCell component, the Song component is parameterized with the song variable, which is hydrated by the graphql query (QUERY) at the beginning of the source. The query will use the ID slug from the URL.
As shown in Listing 8, Redwood.js generates GraphQL queries to support these use cases. The queries are stored in api/src/graphql/songs.sdl.ts.
Listing 8. songs.sdl.ts
export const schema = gql`
  type Song {
    id: Int!
    name: String!
  }

  type Query {
    songs: [Song!]! @requireAuth
    song(id: Int!): Song @requireAuth
  }

  input CreateSongInput {
    name: String!
  }

  input UpdateSongInput {
    name: String
  }

  type Mutation {
    createSong(input: CreateSongInput!): Song! @requireAuth
    updateSong(id: Int!, input: UpdateSongInput!): Song! @requireAuth
    deleteSong(id: Int!): Song! @requireAuth
  }
`
SDL files are schema descriptions for the GraphQL API. The main takeaway from Listing 8 is that a GraphQL endpoint exists for each bit of functionality around the Song's CRUD functions. These actions are the interaction point from the front end to the back end.
Conclusion
The nice thing about Redwood.js is that it isn’t afraid to make a number of key development decisions for us. From a developer's perspective, that means an easy liftoff and more efficient development, especially at the beginning. Like all rapid application development frameworks, what is key is understanding how various program elements hang together as your application becomes more complex. At some point, you will likely need to make changes that are outside of what the framework understands.
Fortunately, Redwood.js stays largely in the confines of well-known technologies and conventions. You can use Redwood to build a React-GraphQL-Prisma-RDBMS application with sensible defaults, which can serve as a launch pad for developing more specific requirements.
Redwood is designed to make it easy to deploy to different host types. In particular, it is possible to deploy to serverless environments like Netlify or Vercel.
As a sidenote, I found building with Redwood.js was reminiscent of Ruby on Rails. It’s been a minute since I used that framework, but it came to mind. As it turns out, Ruby on Rails was an inspiration for Redwood.js. So, if you are a Rails fan, definitely have a look at Redwood.js.


