


Uploading files is a common need for cloud apps. FilePond is a solid open-source project that offers sophisticated file handling and wrappers for many JavaScript frameworks like React and Svelte.
This article gives an overview of handling file uploads with FilePond and a Node.js and Express back end.
Why FilePond?
There are numerous libraries available for the task, but FilePond is supremely easy to use and handles niceties like image optimization without extra configuration. Moreover, it gives the developer a clear-cut process on the server-side.
Coupled with support for Angular, jQuery, React, Vue, and Svelte and a multitude of plug-ins like image preview and resizer, FilePond should be at the top of your list of options when considering file upload.
Set up the FilePond project
Let’s begin by setting up a project to hold the sample code. Create a directory and call it /filepond. Now go to the directory on the command line and type npm init. Accept all the defaults.
Now install the Express server with npm install express. Next, create an index.html file and put it in the project root directory. Update the new file with the contents of Listing 1.
Listing 1. Starter index.html
<html>
<head>
  <link href="https://unpkg.com/filepond/dist/filepond.css" rel="stylesheet" />
  <script src="https://unpkg.com/filepond/dist/filepond.js"></script>
</head>
<body>
  <input type="file">
</body>
<script>
  const inputElement = document.querySelector('input[type="file"]');
  const pond = FilePond.create( inputElement );
</script>
</html>
Listing 1 begins by importing the FilePond style and code from the unpkg CDN. You can also integrate it via npm and a build tool or import it directly.
The markup consists only of a file input. Finally, the script at the bottom grabs a reference to the file input and then uses the FilePond API to create a new FilePond instance with the input element FilePond.create( inputElement ).
Now we’ll add a script to run the app. Modify the package.json file to include line 7 from Listing 2.
Listing 2. Adding the dev script
{
  "name": "filepond",
  "version": "1.0.0",
  "description": "",
  "main": "index.js",
  "scripts": {
    "dev": "nodemon server.js",
    "test": "echo \"Error: no test specified\" && exit 1"
  },
  "author": "",
  "license": "ISC",
  "dependencies": {
    "express": "^4.17.1"
  }
}
Make sure nodemon is installed globally by typing nodemon -v from the CLI. If it’s not found, install it with npm install -g nodemon.
Now you can run the app by entering npm run dev at the root of the project.
While the app is running, you can visit the simple starter page by opening a browser to http://localhost:43000/.
You will be greeted with a simple file input component. Although FilePond is not tied into a back end yet, you can go ahead and select a file from your local file system by clicking Browse or by dragging a file onto the FilePond component. FilePond will dutifully queue it up.
Handling the file upload
The first step in interacting with the back end is to tell FilePond where it is. FilePond can handle any URL. In our case, we are going to use a relative path from the same domain. If you use an absolute URL to another domain, remember that CORS will come into play.
Modify the script in index.html to include the configuration seen in Listing 3.
Listing 3. Setting the server URL
<script>
  const inputElement = document.querySelector('input[type="file"]');
  const pond = FilePond.create( inputElement );
  pond.setOptions({
    server: "/upload"
  })
</script>
Listing 3 tells FilePond to send (via POST) the file bits to the relative URL /upload. Let’s prepare a simple handler on the server to verify the endpoint is being hit. Add the code from Listing 4 to your index.js file.
Listing 4. Mapping the /upload POST
app.post("/upload", function(req, res){
  console.log("BEGIN /upload");
})
Now go back to the browser and refresh the page. Now when you upload a file you can verify that the endpoint is being accessed by looking at the server log and seeing the “BEGIN /upload” output.
Saving the temp file
When you upload a file, the server first writes the file somewhere temporarily. The server responds with a unique ID to acknowledge the upload, and when the client submits the form containing the file input, it will contain the unique ID. The server then uses the unique ID to locate the temp file and moves the file to its long-term home.
There are a number of varying approaches you could take to supporting these requirements on the server side, using both the file system and databases.
This example will use the Formidable library to handle the multipart POST that FilePond sends. Formidable is a mature and capable library, and it’s flexible enough to allow for writing custom stream handlers. If you wanted to save the file to a database, for example, you could handle the file chunks yourself and stream them to the data store.
We’ll simply write the temp file to disk for this demonstration. Begin by installing Formidable: Stop the server (if its running) and type npm install formidable. Now you can restart the server.
Go to index.js and import the library by inserting this line at the beginning of the file:
const formidable = require('formidable');
Then update index.js with Listing 5.
Listing 5. Accepting the temporary file
app.post("/upload", function(req, res){
  console.log("BEGIN /upload");
  const form = formidable({ multiples: false });

  form.parse(req, (err, fields, files) => {
    if (err) {
      next(err);
      return;
    }
    let theFile = files.filepond.path;
    console.log("theFile: " + theFile);

    res.writeHead(200, { 'Content-Type': 'text/plain' });
    res.end(theFile);
  });
})
With Formidable, accepting the file is painless. If you now upload a file via the web interface, you’ll see in your logging that the file has been written to the default temp file location. On my local system, for example, that is C:\Users\mtyson\AppData\Local\Temp\.
You can open the file and verify it is the file you sent.
Notice that the app sends a plain text response, using the file path. This is somewhat insecure in a real world scenario, because end users could see your file structure and glean information about the system (like my file path reveals that it is a Windows system).
For production use, you’d want a layer of indirection whereby you save the file and create a unique ID that you associate to the file path. For our purposes, we’ll just use the file path.
Finalizing the file upload
Now return to the client. We will wrap the uploader in a form and submit it, and consider where to save the file for long-term storage. Since the form is only sending the path (or unique ID) of the file, it can be handled easily as an AJAX request with JSON. We’ll just keep it simple and use a form submit for our example, in Listing 6.
Listing 6. The uploader form
<body>
  <form style="display:grid;" action="/save" method="POST">
    <input type="file">
    <button type="submit" onclick="">Save It</button>
  </form>
</body>
Now when the button is clicked the file path will be submitted, with a default label of “filepond” (this is configurable). In this case, we send the info to /save via a POST.
Note that if you set the file input to multiple support, FilePond will handle queueing multiple files for you.
To handle the submit, return to index.js and use the Express urlencoded middleware:
app.use(express.urlencoded({ extended: true }));Now you are prepared to receive the file information. Add the handler seen in Listing 7.
Listing 7. Receiving the save
app.post("/save", function(req, res){
  console.log("BEGIN /save");
  console.log(`req: ${JSON.stringify(req.body)}`);
})
With the handler in Listing 7 in place, you should see logging to confirm the info has arrived. The logging will look something like this:
req: {"filepond":"C:\\Users\\mtyson\\AppData\\Local\\Temp\\upload_28331577a229fe48443275b2655a1abe"}You are free to now read the file from disk and do what you want with it. It can be read from disk with Node’s built in fs module as seen in Listing 8.
Listing 8. Reading the temp file from disk
const fs = require('fs');
//...
let fileData = fs.readFileSync(req.body.filepond);
Listing 8 creates a buffer object of the file. You can write this out to another location on the file system (also using the fs module), to an Amazon S3 bucket, or to a database like MongoDB.
For instance, in MongoDB, you can take the buffer as-is and write it to a field like so:
require('mongodb').Binary(fileData)That summarizes the full cycle of uploading and saving a file. We’ll wrap up with a look at the image previewer extension.
It’s simple to add the image previewer to your app, as seen in Listing 9.
Listing 9. Image previewer plug-in
<head>
  ...
  <script src="https://unpkg.com/filepond-plugin-image-preview/dist/filepond-plugin-image-preview.js"></script>
  <link href="https://unpkg.com/filepond-plugin-image-preview/dist/filepond-plugin-image-preview.css" rel="stylesheet">
</head>
<body>
 ...
 FilePond.registerPlugin(FilePondPluginImagePreview);
 ...
</body>
Now when you upload an image file, you will see a preview, as displayed in Figure 1.
Figure 1. Image previewer
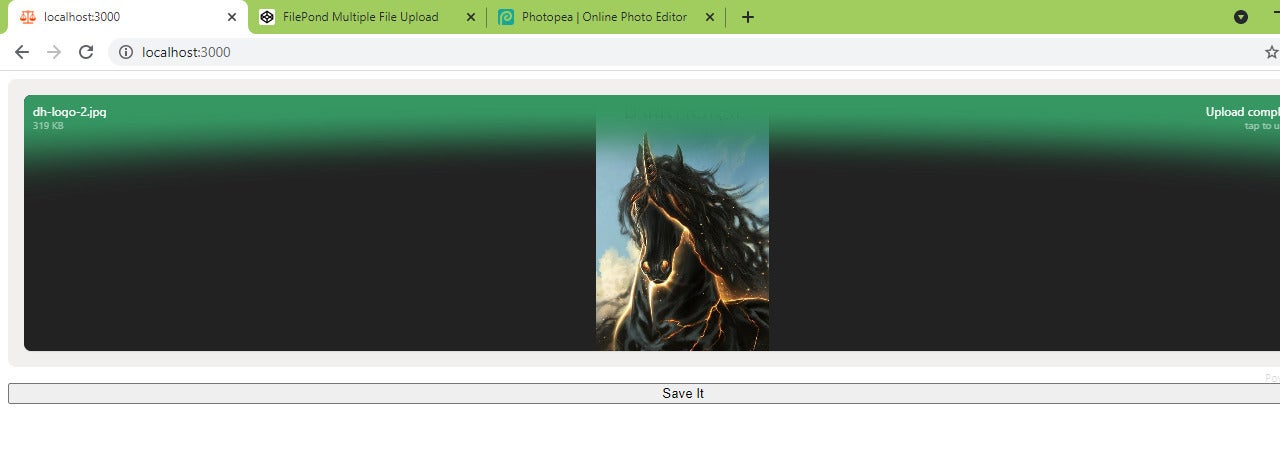 IDG
IDGAs you have seen, FilePond gives you a modern file uploader component in an easy to use API. There are a multitude of other FilePond plug-ins available too, including a full-blown image editor (via integration with Pintura/Doka).