


Build processes can be quite sophisticated for enterprise applications, but even simple and early-stage projects can benefit from automated build pipelines. This article describes a quick-to-deploy system for running an automated build, test, and deploy pipeline with Node.js, Jenkins, and Git.
You’ll need Git and Node/NPM installed on your system to follow along. You’ll also need a Google Cloud Platform (GCP) account. (Google offers a generous free trial account.)
This article is focused on the devops side of things, so we won’t go into detail on how the Node.js app works.
We’ll use the simple starter found here, to create a “Hello World” Node.js app.
Get started
We are going to set up a build pipeline that will respond to check-ins to our repo, so begin by forking the project. Go to https://github.com/fhinkel/nodejs-hello-world in your browser, and click “Fork” as seen in Image 1.
Image 1. Forking the project
 IDG
IDGNow you can clone your project to your local system by typing:
git clone https://github.com/<YOUR USERNAME>/nodejs-hello-world.git
(replacing <YOUR USERNAME> with your username)
When this completes, a new /nodejs-hello-world directory will be added to your file system.
Move into that directory and type npm install. It will take just a moment to install the dependencies.
Next, type npm run start. The app should now be running, and you can go to localhost:30 to see the simple “Hello World!” response.
Install the Node app on GCP
Now log into GCP. If you need to, you can create a free account here. Create a new VM instance in the GCP console by clicking “Console” in the top right, and then clicking “-> Go to Compute Engine” in the dashboard (or you can select “Compute Engine” from the left-hand slider menu).
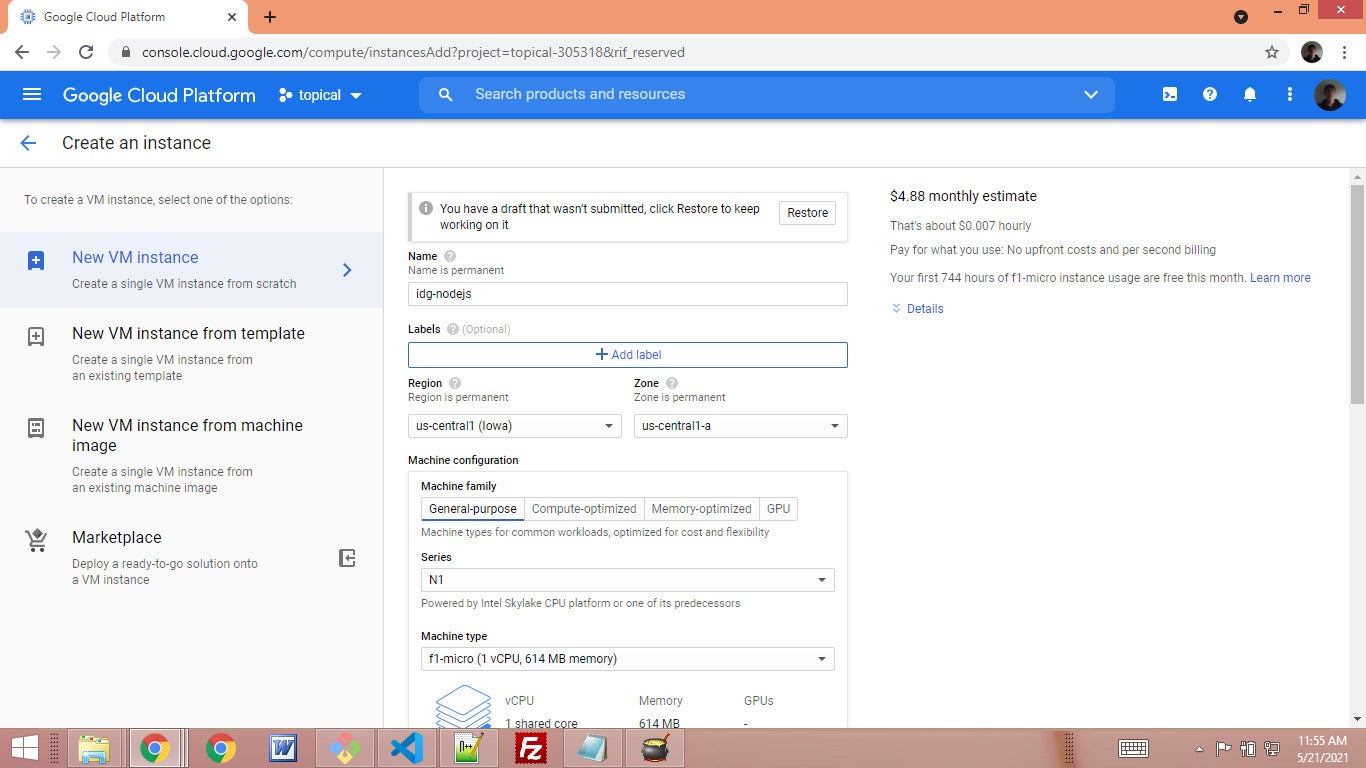
Clicking “Create instance” will bring up the instance configuration screen as seen in Image 2.
Image 2. Creating an instance
 IDG
IDGGive the instance a name you will remember. And notice that I’ve selected N1 as the series and Micro-1 as the machine type. This machine profile is in the free tier (even after the trial period ends), but it is only suitable for very simple uses, not for real-world dev or test, and certainly not production.
Make sure to select “Allow Default HTTP Traffic” so the platform will automatically open port 80 in the routes.
Once you hit the “Create instance” button, the instance will appear in your list of VMs. You can now SSH into the VM by clicking the “SSH” button. This is handy for quickly obtaining a CLI to the instance without dealing with keys.
Once the shell opens, you can type cat /etc/os-release to see what OS you are running. In my case, Debian Buster. Now let’s install Git.
First, run sudo apt update and let APT update to latest. Next, type sudo apt install git and accept the prompt by selecting yes. Git is now installed.
Now you can clone the app with git clone https://github.com//nodejs-hello-world, as you did on your local system.
cd into the new app directory. Now install Node/NPM with sudo apt install nodejs npm.
Now you can run the app with npm install followed by npm run start. Then you should be able to hit the app by grabbing its external IP from the list of VMs, and going to it in a browser. In my case, this is http://34.134.201.13/:80. Make sure you access HTTP and not HTTPS.
Running Node apps directly in prod is not recommended. So modify the package.json file to include the following script:
"start": "pm2 start index.js --watch"
Now install the PM2 package globally with sudo npm install pm2. Once that is complete, you can run the app with sudo npm run start and PM2 will take charge of daemonizing the app. You can list the running apps with sudo pm2 list and stop the app with sudo pm2 stop index.
That is a good enough mock-up of a production environment to continue with the devps side of things.
Install Jenkins on GCP
Now create a server just like you did with the app server. In my case, I’ll name it idg-ops. SSH into the new instance as you did before.
The full instructions for installing Jenkins on Debian Buster are here. The quick version is to install Java, install wget, install the key for the Jenkins package, add the Jenkins repo to Debian, and finish by updating APT again. Here are those five steps:
sudo apt install default-jdk
sudo apt install wget
wget -q -O - https://pkg.jenkins.io/debian-stable/jenkins.io.key | sudo apt-key add -
sudo sh -c 'echo deb https://pkg.jenkins.io/debian-stable binary/ > /etc/apt/sources.list.d/jenkins.list'
sudo apt update
Install Git on the Jenkins server
You also need to install Git and Node/NPM on the Jenkins instance:
sudo apt install git
sudo apt install nodejs npm
By default, Jenkins runs on 8080, so let’s open that port up in the GCP firewall rules. Go to “VPC Network -> Firewall” on the left-hand menu of the GCP console. Click “Create Firewall Rule.”
Name the rule “Jenkins” and leave the defaults including “Specified Target Tags.” Add “jenkins” (all lower-case) as the only target tag. In “Source IP Range” put 0.0.0.0/0 to allow all clients. Finally, for “Specified Protocols and Ports” select “TCP” and set it to 0.0.0.0/8080.
Open the list of VM instances again (left-hand menu: “Compute Engine -> VM Instances”) and select the Jenkins instance you created earlier. Now you just need to add the Jenkins tag. Click “Edit” and in the tags field add “jenkins”.
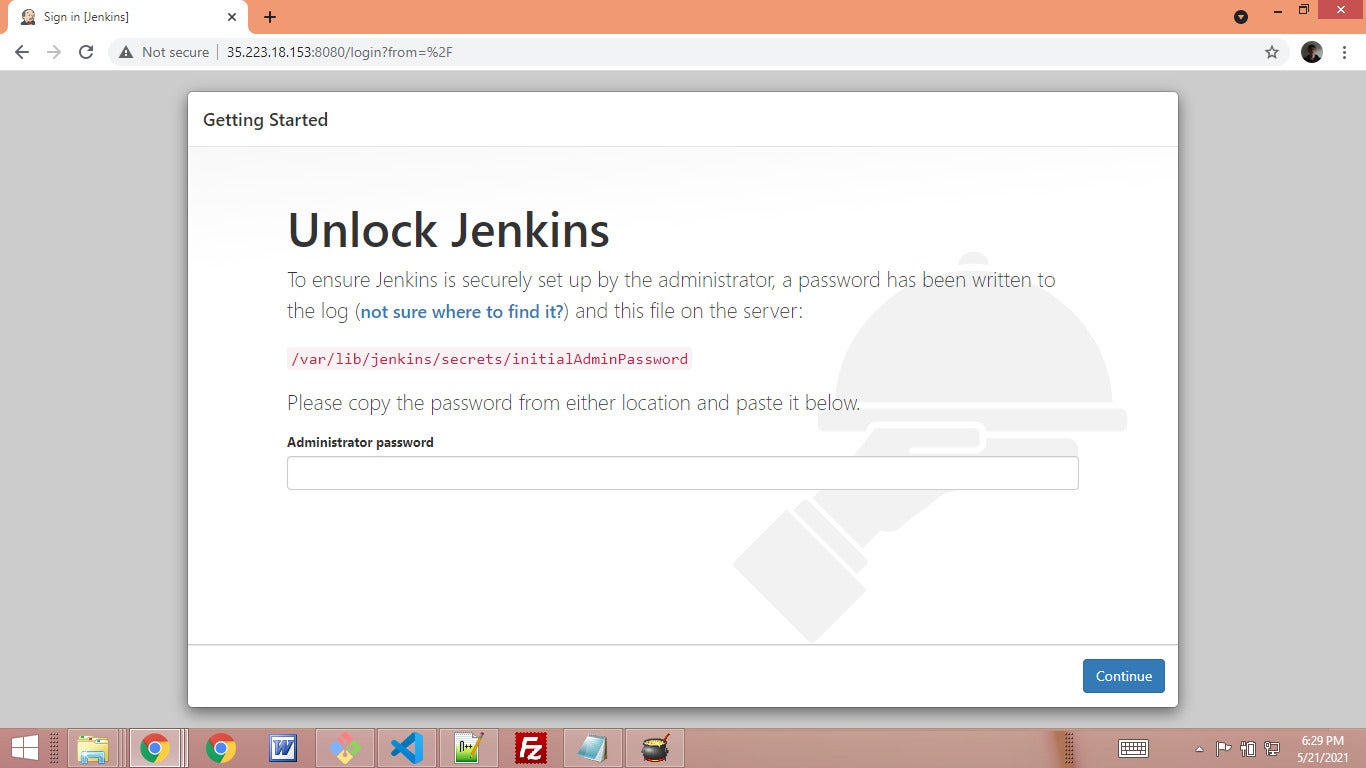
Now if you navigate to the IP address for your Jenkins instance, at 8080, you’ll be greeted with the Jenkins landing page as seen in Image 3.
Image 3. Jenkins landing page
 IDG
IDGAs the page tells you, you need to find the logs to obtain the admin password. (This ensures that you are someone with access to the system the server is running on.) On the Jenkins server, open the /var/ and grab the password you see there, as in Listing 1.
Listing 1. Jenkins password in log
*************************************************************
*************************************************************
*************************************************************

Jenkins initial setup is required. An admin user has been created and a password generated.

Please use the following password to proceed to installation:

YOUR PASSWORD HERE

This may also be found at: /var/lib/jenkins/secrets/initialAdminPassword

*************************************************************
*************************************************************
*************************************************************
Once you return to the browser and plug in your password, you can begin configuring Jenkins. For the purpose of this article, you can just select the “Install Recommended Plugins“. In a real-world situation, you would take the time to cherry pick exactly what you need.
When Jenkins is finished running its default installations, it will prompt you to create an admin user — go ahead and do that. Finally, Jenkins will ask you for the absolute URL of the install, and you can leave that as is, with the IP and port that it detected.
Click “New Job” and give it a name (I used “nodejs”). Then click “Freestyle Project” and “OK”.
Configure GitHub webhook to Jenkins
Set aside Jenkins for a moment and jump over to your GitHub account, to the nodejs-hello-world project, and click the “Settings” tab. On the left-side menu, select “webhooks”. In the webhooks detail screen, click “Add webhook”. A webhook allows GitHub to POST to a URL when events occur.
For the webhook URL, use the URL for your Jenkins install followed by /github-webhook. In my case, that URL is http://35.223.18.153:8080/github-webhook. Set the “Content Type” to “application/json”.
There are a multitude of event types you can use to refine what exactly causes the webhook to run, under “Let me choose”, but for now we’ll just use “Pushes” and leave things as they are. Go ahead and click “Add webhook”.
Now return to Jenkins. Log back in if you need to, and select the project you created earlier. Click “Configure” on the left. Go to the “Source Code Management” section and select “Git”. Now put the URL to your Git repo in the URL field. (In my case https://github.com/MTyson/nodejs-hello-world.)
Jenkins is sensitive about Git URLs
Jenkins will use the URL you put into the Git config of the project to match against the webhook push coming from GitHub.
Pay close attention that the cases match. If you are seeing logs on the Jenkins server that acknowledge the push but not seeing the build kick off, double-check the URL. (The Jenkins log entry will look something like "2021-05-22 19:34:26.515+0000 [id=18] INFO o.j.p.g.w.s.DefaultPushGHEventSubscriber#onEvent: Received PushEvent for https://github.com/MTyson/nodejs-hello-world from 140.82.115.154 ⇒ http://35.223.18.153:8080/github-webhook/".)
Test the integration
Now you can go to the project on your local system and test the integration. Open index.js and change the “Hello World!” message to “Greetings!”
Now add the change with git add index.js, commit it with git commit -m "hook test", and push it to the repo with git push origin master.
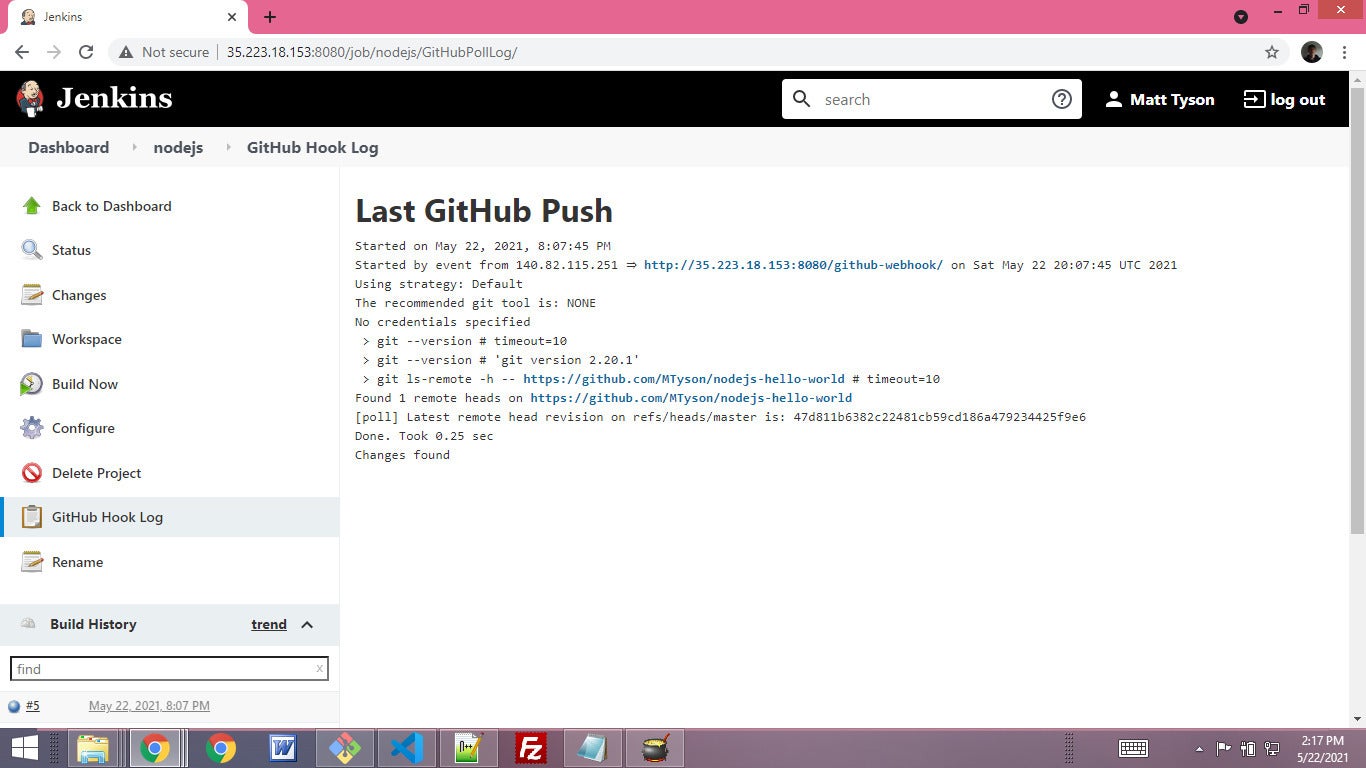
You can verify the webhook is running by going to “GitHub Hook Log” on the left, where you should see an entry similar to Image 4.
Image 4. Successful Git hook build run
 IDG
IDGYou will also see that if you go back to the dashboard, the project is now showing a recent succesful build. (If the build failed, make sure you installed Git on the Jenkins server.)
In a production system, you would run tests against the project every time a commit arrives on master/main. You can do this by going to the project config and clicking “Add a Build Step” and creating a shell command that runs npm install followed by npm run test, or you can create shell scripts for more elaborate needs.
If you modify the package.json test script to give a 0 exit code (change exit 1 to exit 0) then you can simulate tests passing.
Once the tests have passed you want to push the validated build to production.
Return to the SSH shell to the Jenkins server. Now set a password on the “jenkins” user that was created for you when Jenkins installed: sudo passwd jenkins. Switch to that user: su jenkins.
Now generate a key for the user that it will use to authenticate against the prod server: ssh-keygen -t rsa. You can accept defaults, noting that in a real-world situation you would use a passphrase.
Still on the Jenkins server, enter the command:
ssh-copy-id NODE_SERVER_USER@NODE_SERVER_IP
(In my case, this is ssh-copy-id matthewcarltyson@34.134.201.13.)
The ssh-copy-id utility will copy the public key over to the Node.js server.
When that is complete, you should be able to SSH directly from the Jenkins machine to the Node machine:
ssh NODE_SERVER_USER@NODE_SERVER_IP
(In my case, ssh matthewcarltyson@34.134.201.13.)
This means the jenkins user on the Jenkins server can now SSH without a password to the Node production server.
As a last step, we'll create a shell script build step that triggers after the test build step. If the tests pass, this step will run by SSH-ing into the Node server, pulling the latest from Git, and restarting the server, as seen in Listing 2.
Listing 2. Build step: Pull latest, restart server
ssh matthewcarltyson@34.134.201.13 <<EOF
 cd ~/nodejs-hello-world
 git pull
 npm install
 pm2 restart all
 exit
EOF
Listing 2 works great, except for one common problem that we’ll solve next: the Jenkins user is using the normal user (in my case matthewcarltyson) to SSH to the Node server and restart the app. That’s good, because you don’t want to run the app as root (bad security). But in Linux, you cannot listen on port 80 as a normal user. So do the following:
- Stop the running server:
sudo pm2 delete index - Start the server as a normal user:
pm2 start index.js - Go to the GCP console and add a VPC network tag called “nodejs” to the Node.js VM instance.
- In the GCP console, create a network firewall rule that allows TCP:80 to the “nodejs” tag.
- On the Node.js server command line, reroute requests from 80 to 8080:
sudo iptables -t nat -A PREROUTING -p tcp --dport 80 -j REDIRECT - Change index.js to listen on port 8080 instead of port 80, on your local machine, and check it in.
Now when you check in changes to the project, Jenkins will automatically build and run a test, update the production instance, and restart while listening on 80.
Viva CI/CD
The build pipeline for our Node.js app demonstrates many of the key elements of a devops CI/CD pipeline. It’s not the only approach. The best approach is determined by the demands of the project.
In particular, what we are calling “production” in this article is, in a larger-scale system, really “test” or “qa”. Only after human validation would the build be promoted to production.
Also, one might consider building the app, running automated tests on it, then copying the actual build over to the next stage, thereby eliminating a build step.
For even more robust requirements, a validated build once actively running would take over load via rerouted network traffic. In microservices under heavy load, this can be done incrementally via an API gateway.